Custom Post Templates are used to present content in unique layouts. As its name suggests, you can create custom post templates for categories, tags, or specific posts in WordPress.
Today, we are going to learn how to create custom post templates in WordPress. Although you can proceed with manual routines, involving coding, this write-up helps you create custom page templates with a page builder.
Here is a list of what you will be covering in this article.
Introduction to Custom Post Templates
Post templates are pre-made designs, layouts, or blocks that help you design your content pages. In simple words, post or page templates control how your blog’s content should display to the end users.
For example, once you’ve published a page or post in WordPress, page or post templates decide how readers should see your blog’s content, font, screenshots, hyperlinks, and indentation.
Post templates help bloggers feature, present, or format blog content in unique manners.
Create Custom Blog Posts or Page templates in WordPress
There are different ways to create custom post templates in WordPress. Let’s proceed to list and describe each method with a brief explanation.
Ways to create Custom Post Templates in WordPress:
1. Manual Approach
If you know about writing custom source code (HTML, CSS, PHP, JavaScript), you can code a custom page template in WordPress.
This method is a bit advanced as it requires you to edit theme files, copy and paste code, and optionally add custom CSS.
First, you need to open a plain text editor on your computer like Notepad and paste the following code inside it:
/*
 * Template Name: Featured Article
 * Template Post Type: post, page, product
 */

 get_header();
This code defines a new template called ‘Featured Article’ and makes it available for post, page, and product post types.
You should save this file wpb-single-post.php on your desktop. Next, you need to add the template to your WordPress site.
Now you can log in to your WordPress admin area and create or edit a post. Scroll down a little on the post edit screen, and you will notice a new ‘Template’ panel or ‘Post Attributes’ meta box with an option to select the template.

You will see your ‘Featured Article’ custom template listed there.
Right now your template is essentially empty so selecting it will simply display a white screen. You need to use WordPress standard functions to make your content appear on this template in frontend like get_header(), get_footer(), etc.
2. WordPress Plugins
Plugins like SeedProd can also help you create a post template with drag-and-drop options. Such plugins provide premade templates, ready to edit and create a custom page template.
You can create page templates by using plugins like:
example plugin
3. WordPress Block Editor
The WordPress native editor provides the option to create a custom page template with blocks. You can call it WordPress’ native page building.
The default WordPress block editor comes with a built-in feature that allows you to save and reuse blocks. One such reusable block is the group block.
The group block allows you to put several blocks and entire post layouts into one group. You can then save this group block and reuse it in your other posts.
Let’s take a look at how to use the group block to save your custom post templates.
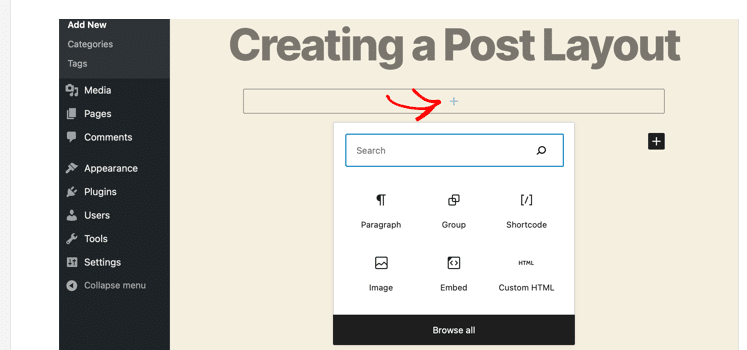
First, you need to create a new post in WordPress. After that, simply add a group block to the content area

Now you can start adding blocks into the group block to create a single post layout for your WordPress blog.
You can add any blocks you want including columns, media and text, cover images, and more.
Once you are satisfied with the layout you have created, you need to take your mouse up and select the group block.
Simply click on the three-dot menu icon and then select the ‘Add to Reusable blocks’ option.
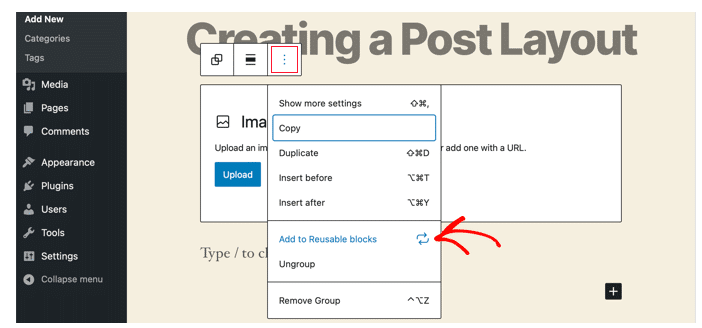
Next, you need to provide a name for the reusable block and then click on the Save button. WordPress will now save your reusable block including all the blocks inside the group block.
You can then edit any existing post on your website or create a new one. On the post-edit screen, simply click on the add new block button and look for your saved block under the ‘Reusable’ tab.
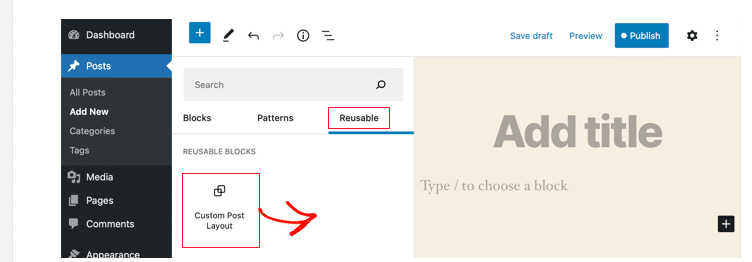
Add the block to your post and WordPress will load your entire group block with all the blocks and settings as you saved them.
This method allows you to save your custom layouts. However, it does not allow you to change how your theme handles single posts.
4. Page Builders
By using a page builder, such as Divi Builder, you can manually create a custom post template in WordPress. Once you’ve installed and activated your page builder, creating a custom page template from scratch becomes an enjoyable routine.
Note: As mentioned above, we’re going to create a custom page template using a page builder in this article. Let’s proceed without further delay.
Using Page Builder: How to Create a Custom Post Template?
Let’s proceed to create a custom post template using Divi Builder. It helps you design a page from scratch, or create and assign a layout to multiple posts, categories, or tags.
Step (1) – Setup Divi Builder
There are two options to set up Divi Builder in WordPress.
- If you’re using the Divi theme, you can proceed to the next step. In this case, the Divi theme has a built-in option to create custom post templates in WordPress.
- If you’re using a different theme, you can still use the Divi Builder in WordPress. In this case, you will need to upload and activate Divi’s plugin, without deactivating the existing theme.
Once you’ve set up Divi Builder using the above options, you should see the following Divi option in the dashboard.
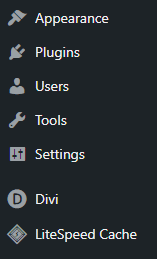
You’re now ready to proceed to the next step.
Step (2) – Theme Builder
In the WordPress dashboard, click on Divi -> Theme Builder. This will load Divi’s custom post and page-building screen, as shown in the following screenshot.
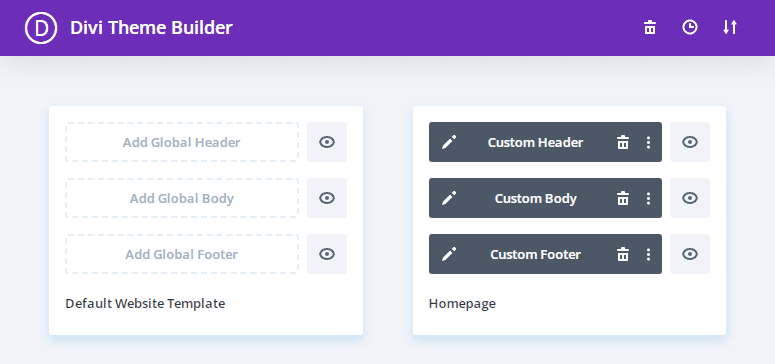
Here, you can manage a custom post or page template in WordPress. You can add, edit, change assignments, or remove a custom template using Divi.
Let’s proceed to add a new custom post template using the page’s options.
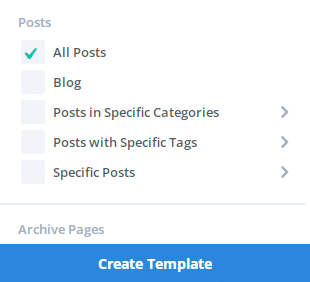
Click on the Add New Template option shown on the page. This will open up a list of options to choose from. For example, you can choose a page, post, or category for the new custom template.
From the list, proceed with the All Posts option. Here, you can also choose All Pages if you’re creating a template for pages. Don’t forget to click on Create Template once you’ve selected the said option, as shown in the screenshot below.
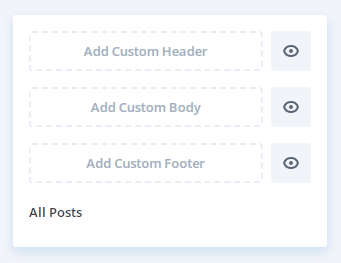
You can now see, a custom post template has been created. Click on the Save Changes button at the top of the page.
The new custom template still needs to be designed. So far, we’ve initiated and assigned the custom post template to “all posts”. From now on, each blog post will derive its design from the custom template we’ve created.
Step (3) – Design the Custom Post Template
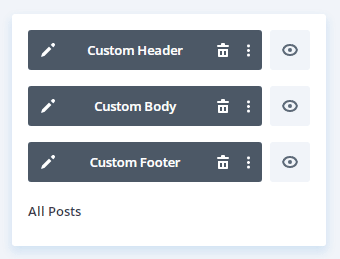
As shown in the screenshot below, the custom post template provides the option to create its Header, Body, and Footer.
Clicking on the Add option helps you start designing the respective section. Once clicked, you can add a block or premade design from saved templates, Divi Library, or design one from scratch. Here, you can choose and proceed with a relevant option.
First, you will need to create a Header, followed by paying attention to the Body and Footer. In case of adding a premade design from saved templates, you can proceed and include one. In this case, following the on-screen instructions is enough to proceed.
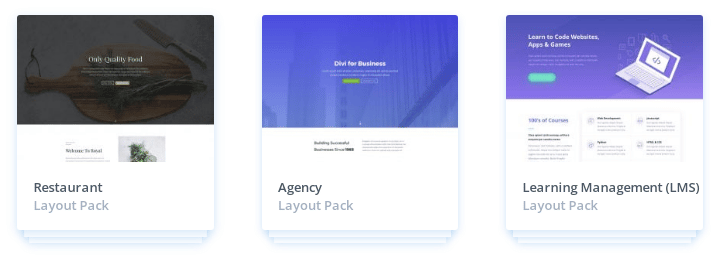
As shown in the screenshot below, the Add from Library option shows your saved layouts and premade templates from Divi’s Official Library.
On the other hand, if you wanted to create a custom post design from scratch, by including your favorite blocks and elements; you can proceed with the Build Custom option.
Once clicked, you can see Divi’s Builder interface. Here, you can add sections, rows, and modules to start designing your new template.
As we’re creating a custom template for posts, we need to start by adding a title bar, along with post body content in the Body’s section.
Note: A Divi’s layout contains a main section, inside which you can add rows that contain different modules. A page can also contain multiple sections.
As you’ve clicked on the Build Custom option, you can see that Divi has already added a section, as shown in the screenshot below. This means you’re now ready to include a Row.

Note: The section is represented by a Blue border.
Let’s proceed to add a new row inside the section. A row helps you present content blocks in different formats.
Click on the green plus sign and choose a Row style to add. Once you’ve chosen one, you can right away add an element, called a module in Divi, such as Text, Image, Blurb, Button, or a Call to Action.
Here, you need to choose a Text module to show the posts’ main title. Once added, you can set additional options in the dialogue box shown on the screen.
Next, you can add a new section for the blog posts’ content. Now, you will need to click on the Blue plus sign to add a new section. Once completed, proceed to add a new row as shown in the above lines.
Let’s proceed to add the post-content module now.
When prompted for adding a new module, you can select and proceed with the “post content” option from the short menu. Here, you can see additional options for the text and save changes to proceed, such as text size, font name, and image settings.
Similarly, you can also design your template’s footer section. Once completed, don’t forget to save changes at the right bottom of Divi’s Builder. In the same manner, click on Save Changes once you’ve returned to the Theme Builder page in the WordPress dashboard.
Once you’ve designed Header, Body, and Footer for the custom template, you should see the following thumbnail on the Divi Theme Builder page in the dashboard.
Note: So far, you’ve completed creating and designing a custom post template in WordPress. In the same manner, you can also create custom templates for pages, categories, and tags in WordPress. For a more in-depth walk-through of creating custom templates with Divi, follow the tutorial.
Step (4) – Test your new Custom Post Template
Browse and load a blog post to see how your new template is working. Once the page has loaded, you should see the blog post in the design you just completed.
Similarly, you can shape up your blog’s categories, tags, and pages with Divi custom templates. If you can invest, you can also purchase Divi’s pre-made templates for blog posts and pages.
In case of having a membership, Divi’s library helps you import premade templates in minutes.
Conclusion
Designing custom post templates in WordPress is easy and enjoyable with a page builder like Divi.
You can control various aspects of a custom template, from font name to size information and indentation.
If you don’t know how to use Divi Builder, follow the instructions provided in the source listed above.
For more information on custom post templates in WordPress, or hiring support services for WordPress, let us know your thoughts on custom plans and support services.